
Better Pressure Cooker Butter Chicken
[Photographs: Vicky Wasik]
The goal of this recipe is to provide you with a better version of pressure-cooker butter chicken, one that hits all of the characteristic notes of a butter chicken—mildly spiced tomato-based sauce; tender, charred chicken pieces; a mother’s love’s worth of butter and cream folded in at the end—without being too taxing to prepare.
The pressure cooker is used in this recipe to reduce the amount of time it takes to make the sauce. If you don’t have a pressure cooker, we have a stovetop recipe for butter chicken that can be made without a pressure cooker.
To dial in the ingredient quantities for this recipe, I mostly relied on my own taste memories of eating butter chicken while I lived in India, but I did refer to the extremely popular Instant Pot butter chicken recipe developed by Dr. Urvashi Pitre as well as the original recipe for murgh makhani published by Monish Gujral, the grandson of the inventor of the dish, Kundan Lal Gujral, in the book On the Butter Chicken Trail: A Moti Mahal Cookbook.
Spices

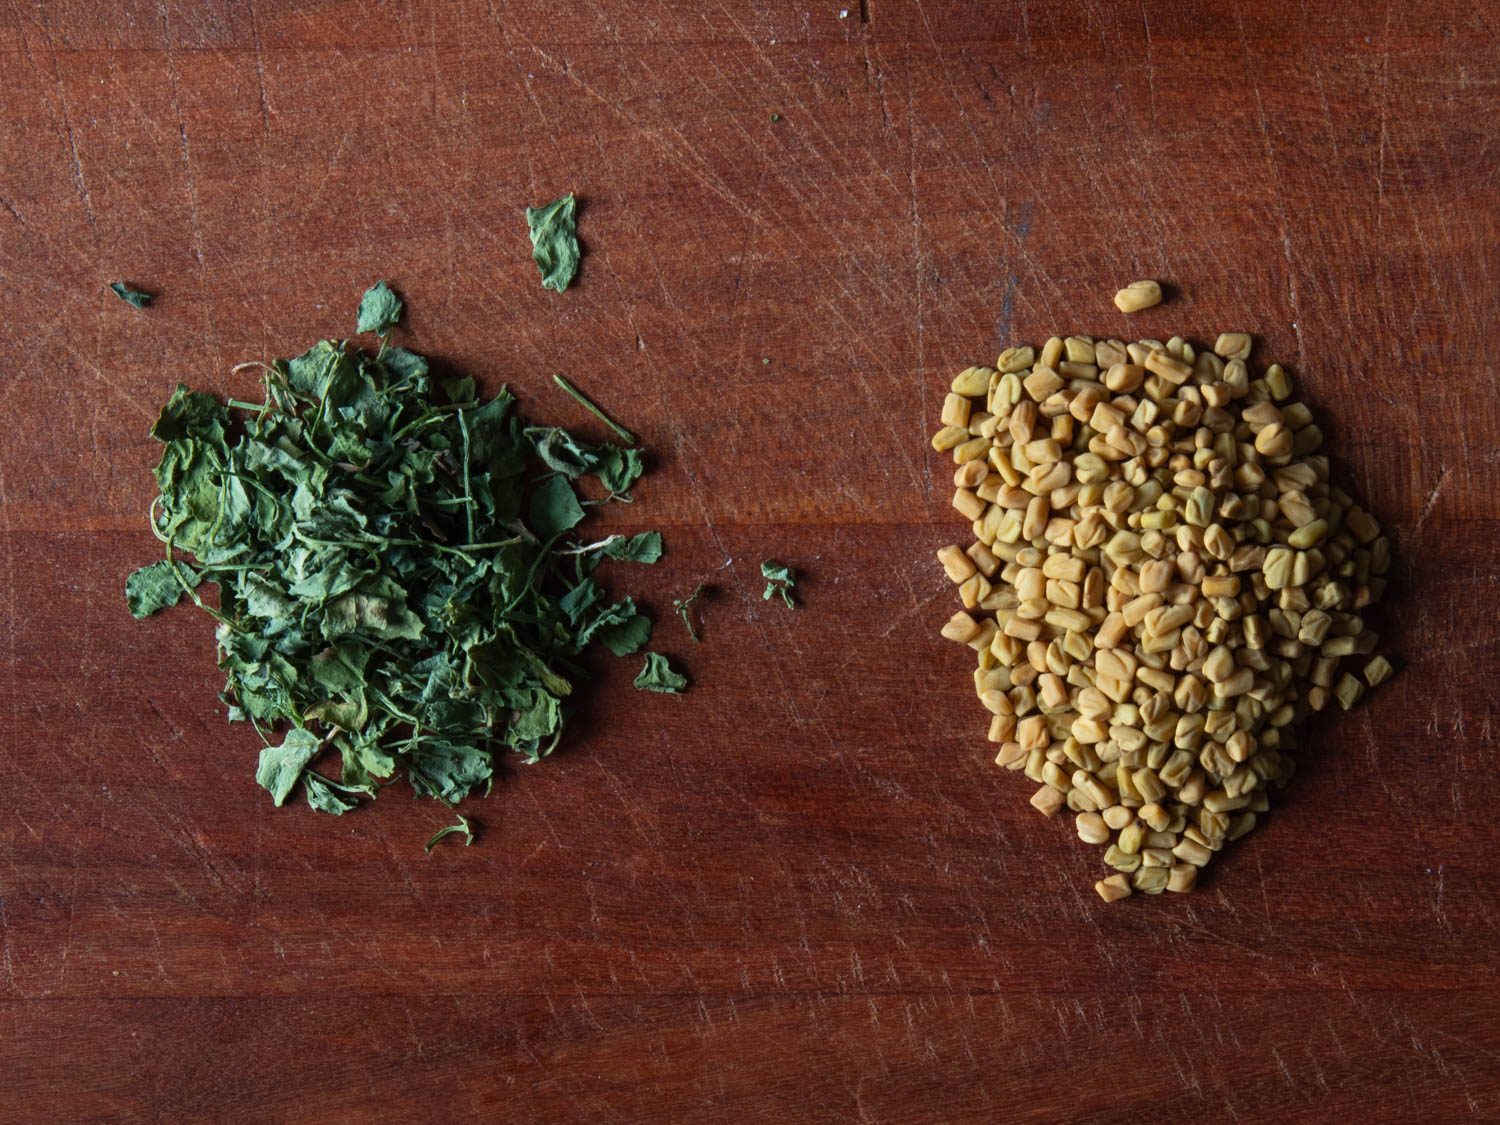
Fenugreek leaves, left, and fenugreek seeds.
Some of the distinctive flavors I associate with butter chicken come from specific spices, namely fenugreek leaves, brown cardamom, and kala namak, or black salt. But I understand that not everyone has them lying around in their pantry, and that some people would be reluctant to seek out and purchase spices that can be difficult to find specifically for this dish, so I tested this recipe with more commonly found alternatives: fenugreek seeds in place of the leaves, green cardamom instead of brown, and standard-issue Diamond Crystal kosher salt instead of black salt. The dish won’t be the same, but it’s still eminently enjoyable.

Green cardamom pods, left, and brown cardamom pods.
There is another spice question to consider, and it has to do with garam masala. Garam masala is a ground spice mixture that varies in composition depending on who’s making it. Ready-made garam masala can vary both in quality and in terms of its component parts.

As you can see above, these purchased garam masalas have very different ingredient lists. This recipe was tested using a variety of store-bought garam masalas as well as with the garam masala recipe we have on the website. Any kind will work, but there will be small differences in flavor depending on the mix you use.
Do note that the recipe ingredient list calls for whole spices to be toasted and ground before you start making the dish. While the dry-toasting can be considered optional, toasting whole spices before grinding them greatly improves their flavor.
The recipe makes a point of calling for mounding the onions in the center of the pot before adding spices and for turning off the heat on electric pressure cookers after browning the onions. Both of these instructions are meant to hedge against the possibility of burning the spice mixture when it’s added to the pot. To reinforce this point: Burning the spice mixture will produce a cloying bitterness, so do be careful.
Tomatoes

This recipe was initially developed using canned whole tomatoes, but many tasters found the tomato flavor to be a little too “fresh” and pronounced in this pressure-cooker version. That complaint was not echoed when tasters commented on the stovetop version in side-by-side tastings, which seemed to suggest that the longer cooking time on the stovetop created a deeper tomato flavor than the short cooking time in the pressure cooker. To improve the pressure cooker version, I tried the recipe using canned whole fire-roasted tomatoes, which seemed to largely address the issue.
Further testing revealed that straining the tomatoes to remove excess liquid improved the flavor further. Rather than just tossing all that liquid, I opted to use a half-cup of it to hydrate the cashews, which helps to soften them up and allows them to blend more seamlessly into a creamy sauce.
Onions
By far the most time-consuming part of this recipe is, as it is in most recipes, frying the onions. To cut down on the time it takes to get the onions to brown nicely, I cribbed a trick from Kenji’s channa masala recipe and added a bit of baking soda to the pot along with the onions, which resulted in a reduction of about 5 minutes in the time it takes to brown the onions, on average. The baking soda seemed to also improve the final “balance” of the sauce, particularly when using more acidic canned whole tomatoes.
Bringing the Mixture to Pressure
In some tests, using just one of the Instant Pots in our test kitchen, the pressure cooker failed to come to pressure and flashed the dreaded “BURN” sign instead. For this reason, the recipe calls for heating the sauce ingredients until steaming before giving the bottom of the pot a good scraping and then securing the pressure cooker lid.
While this seemed to work in subsequent tests, the first time you make this recipe, I suggest you keep a close eye on your pressure cooker after you secure the lid. If the “BURN” sign displays (if you have an Instant Pot) or if you’re worried about the time it’s taking to come to pressure, you can open the lid and add another 1/2 cup of water (or reserved tomato liquid), stir the contents, re-secure the lid, and proceed with the recipe as written. You may need to adjust the final seasoning with a smidge more salt at the end due to the extra liquid.
Broiling the Chicken
While it may seem odd to cook the chicken under the broiler rather than in the pressure cooker, I found the texture of pressure-cooked chicken to be wanting over the course of my testing. Plus, the broiled chicken adds an absolutely amazing flavor to the dish.
For the sake of clarity, the recipe has been broken up into two parts, but I recommend marinating the chicken first, then proceeding to cook the sauce. The time it takes to broil the chicken is identical to the time it takes to pressure cook the sauce, so no time is added to the recipe by broiling the chicken separately. Once the chicken is cooked, you can set it aside while you finish the sauce.
The amount of chicken and yogurt marinade listed in the recipe fits almost perfectly in a quarter-sheet pan. If you don’t have a quarter-sheet pan, the best alternative is to create a quarter sheet pan–sized “boat” (about 13 inches by 9 inches with 1-inch sides) with aluminum foil and place it in the center of a half sheet pan.
Leftovers
This recipe produces extra sauce. You can, if you like, remove 1 1/2 cups of the final sauce before adding the broiled chicken and reserve it for another use. We can heartily recommend tossing wedges of roasted cauliflower in the sauce (any sauce removed before adding the chicken will be 100% vegetarian).
Published at Thu, 05 Mar 2020 10:27:35 +0000

